How to Hang Your Grain and Bolt Door: A Step-by-Step Guide
Safety First
We know that fitting an internal door can feel like a daunting task, but with the right tools and a bit of patience, it’s a very rewarding project. At Grain and Bolt, we treat our doors like high-quality pieces of furniture. This guide will walk you through the process of hanging your door correctly to ensure it looks great and operates smoothly for years to come.
- Chisel with care: Always chisel away from your body and keep your hands behind the cutting edge.
- Eye protection: Wear safety goggles when sawing, drilling, or planing.
- Dust management: Use a dust mask when sanding or cutting timber, especially in enclosed spaces.
Jargon Buster: Speaking the Language
If you are new to joinery, some of these terms might be unfamiliar:
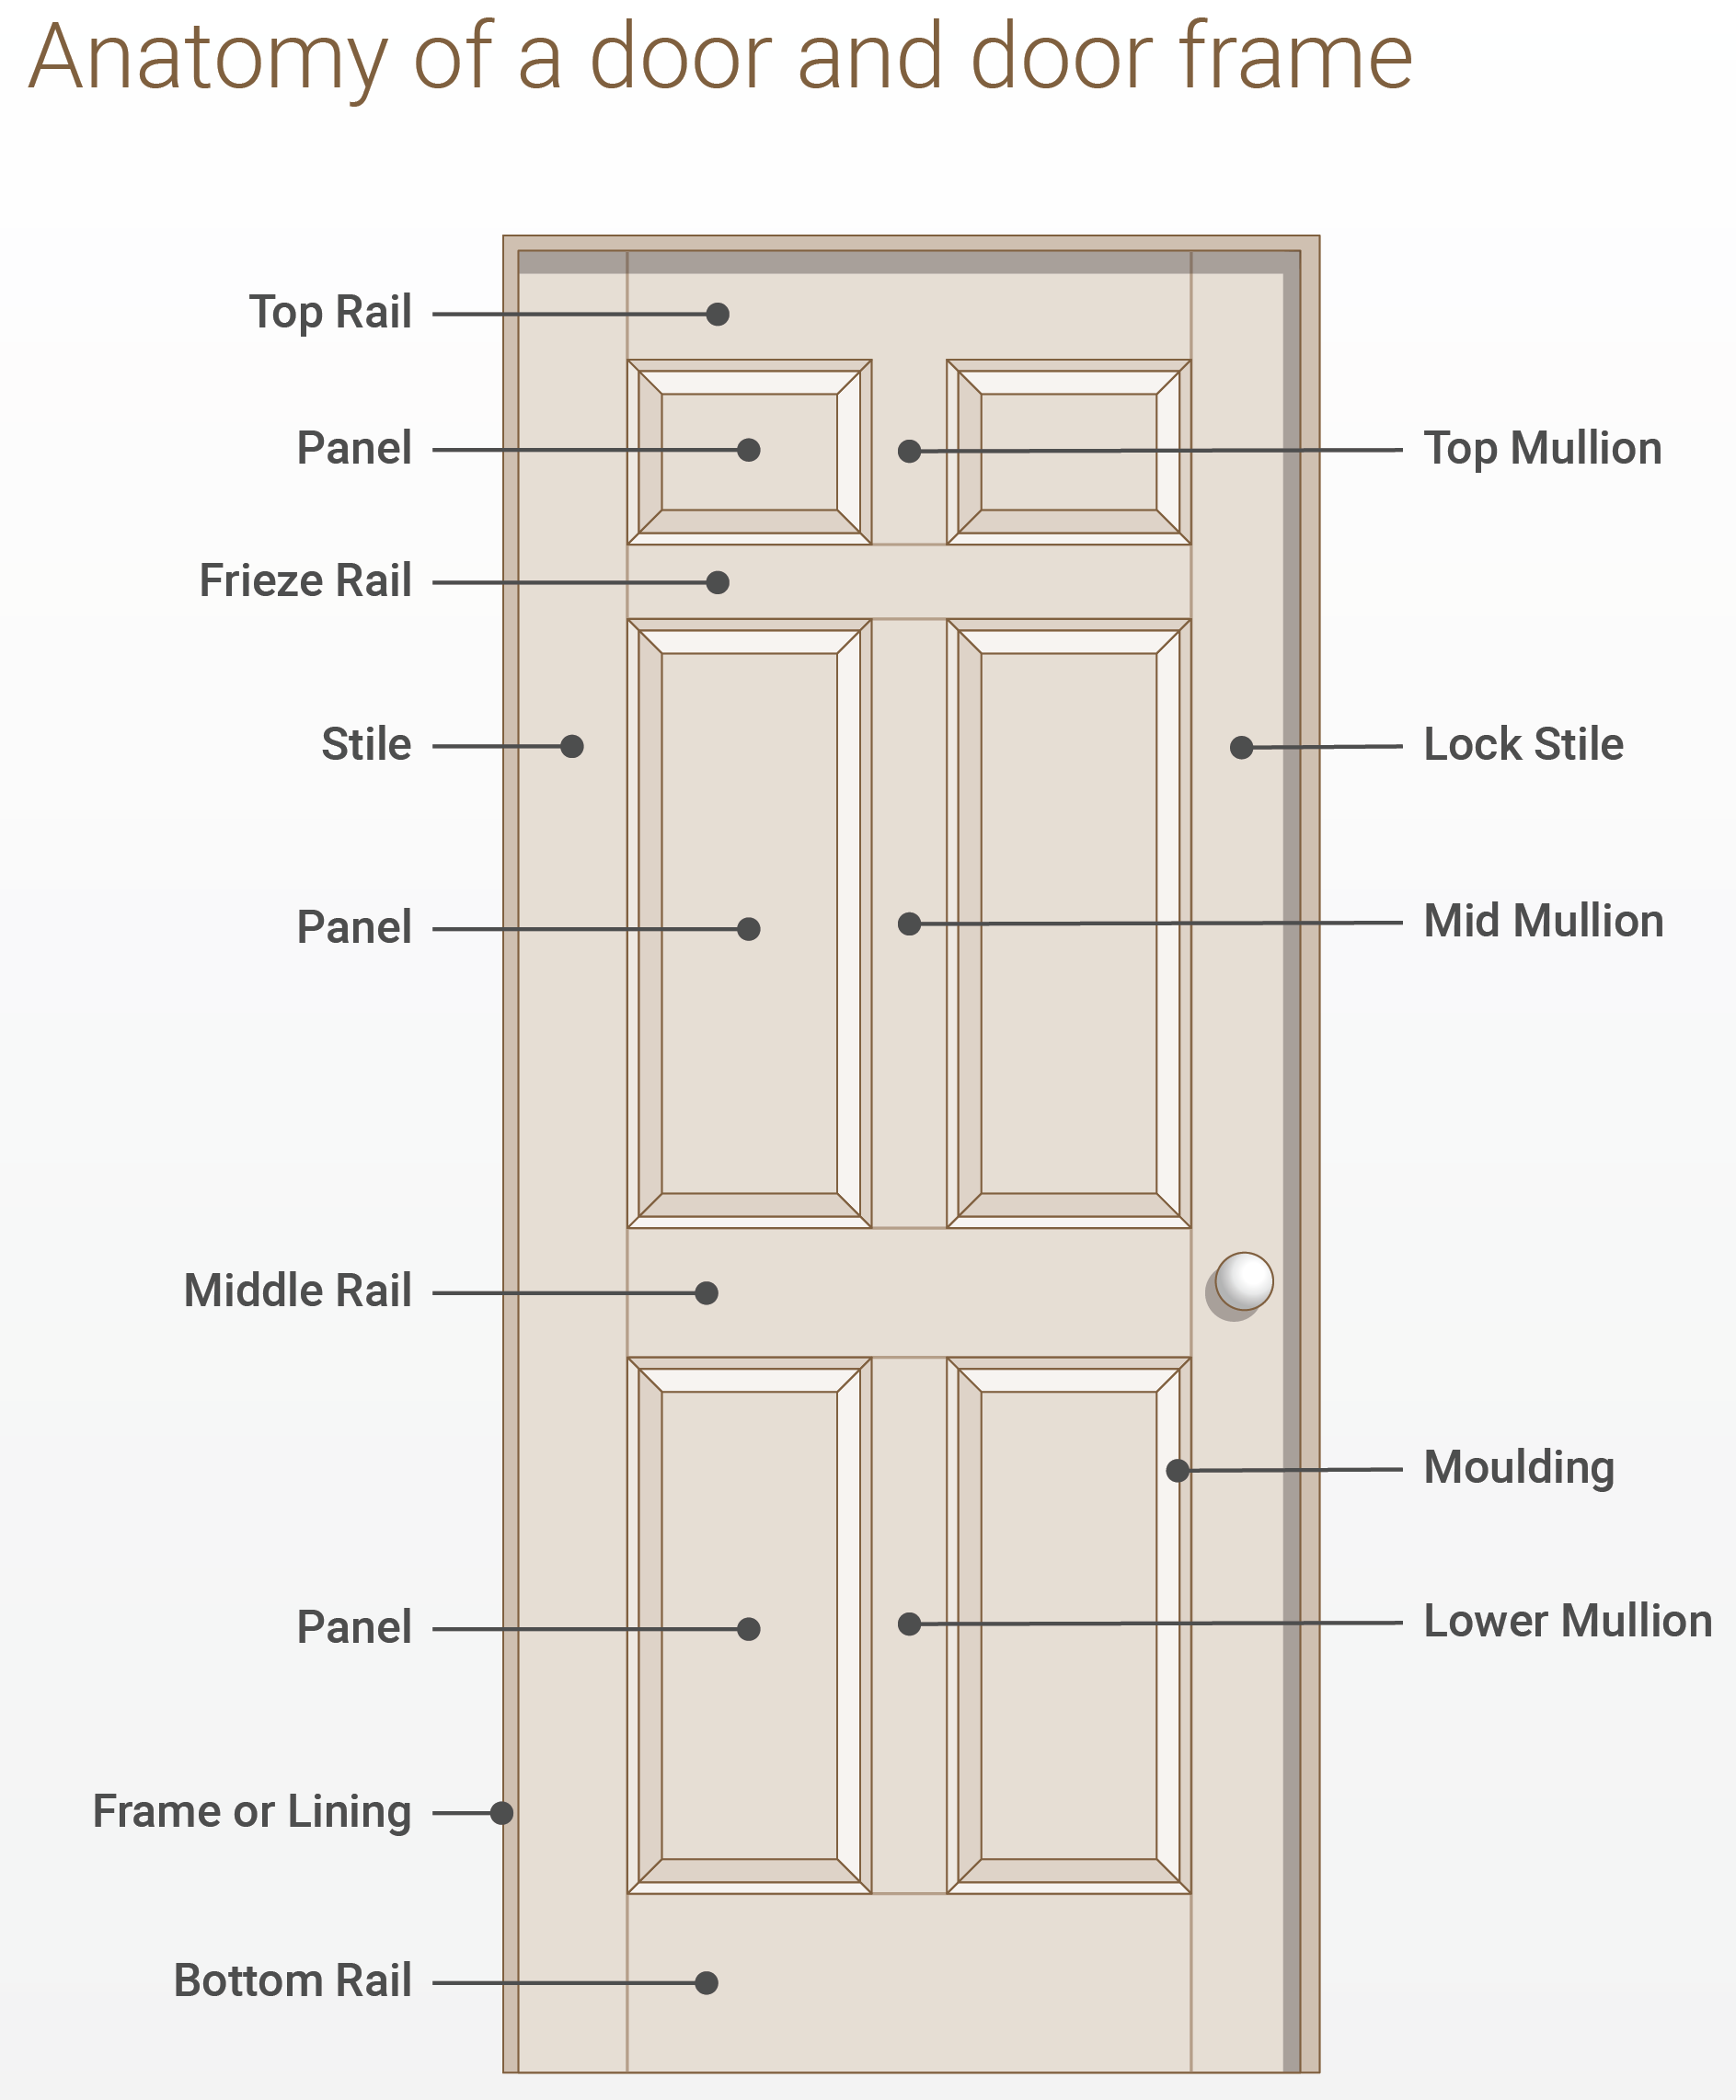
- Stiles: The vertical sides of the door.
- Rails: The horizontal sections (top and bottom) of the door.
- Architrave: The decorative moulding that covers the join between the door frame and the wall.
- Spindle: The square metal bar that connects the handles on either side of the door.
- Hingebound: A common issue where the hinge is recessed too deeply, causing the door to spring open or feel “tight” when closing.
- Leading Edge: The edge of the door that meets the frame when closing (opposite the hinges).
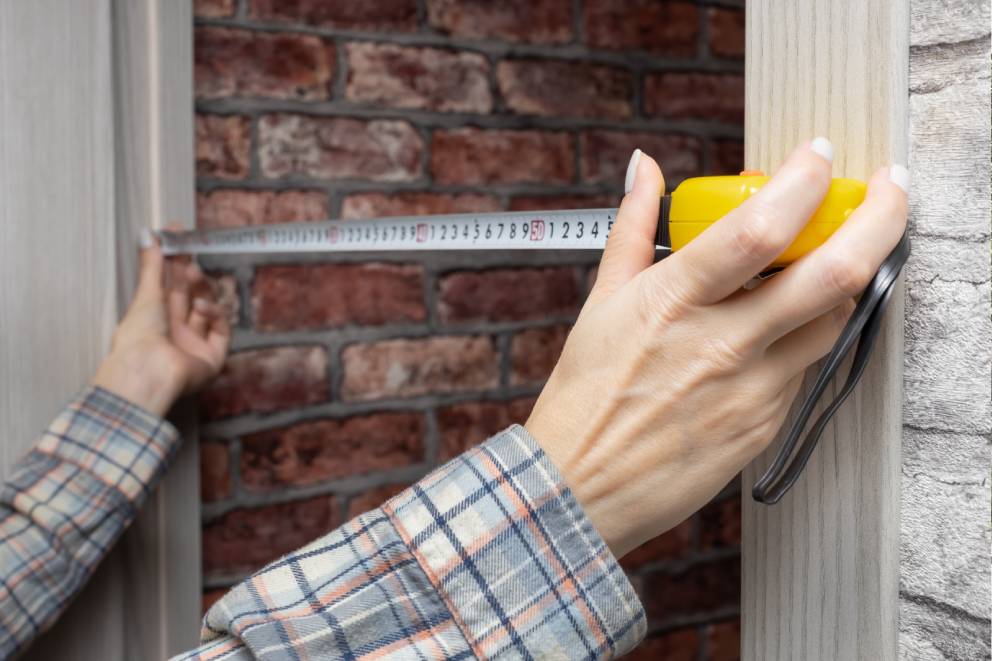
Step 1: Measuring and Acclimatisation
Before you pick up a tool and attempt to fit an internal door, it needs to acclimatise to your home environment.
- Let it settle: Remove the packaging and keep the door in the room where it will be fitted for 72 hours. This allows the timber to adjust to the temperature and humidity of your home.
- Measure twice: Measure the height and width of your frame in three places. Use the largest measurement to determine if your door needs trimming.
- The “Penny” Gap: Ideally, you want a 2mm–3mm gap between the door and the frame at the top and sides. A flat penny is a perfect guide for this.
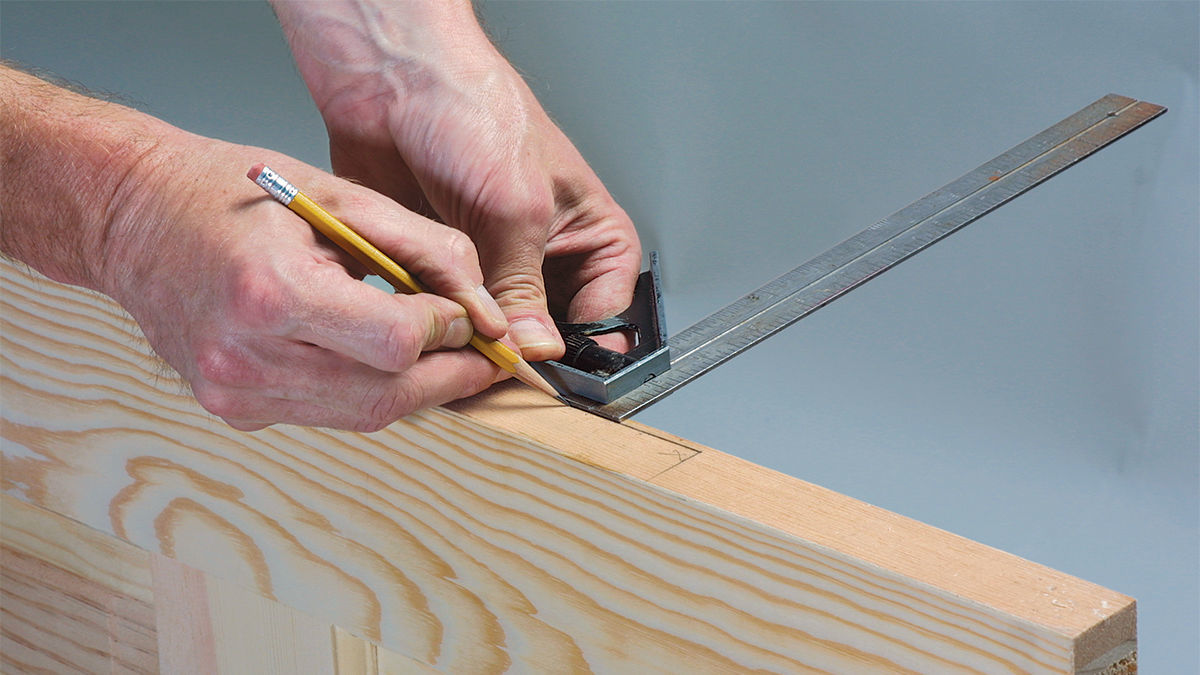
Step 2: Trimming to Size
Most homes don’t have perfectly square frames, so some trimming is usually required.
- The Limits: Doors have 8-20mm hardwood edges (lippings), when trimming edges down ensure there is at least 4mm of lipping left all round the door – this is important for screw retention.
- Balance the cut: If you do need to trim the door down, take equal amounts from all edges to keep the door symmetrical.
- Planing: Use a hand or electric planer for fine adjustments. Always plane towards the centre of the door at the corners to avoid splitting the end-grain.

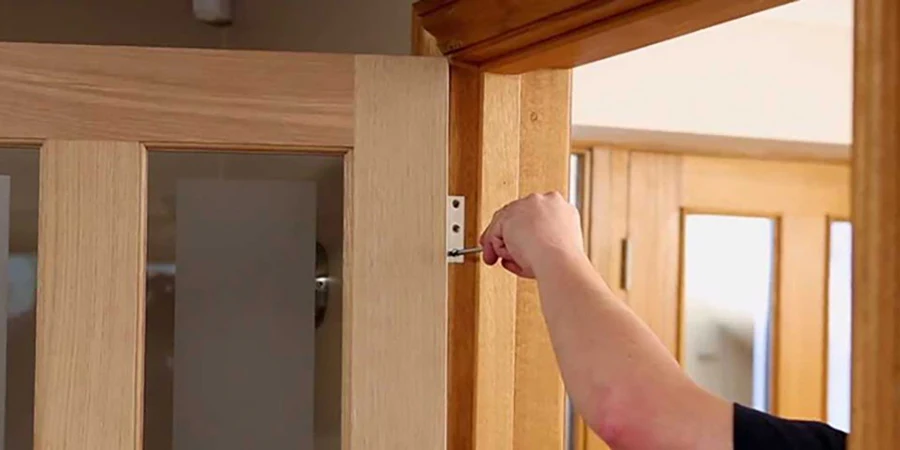
Step 3: Fitting the Hinges
For Grain and Bolt doors, we always recommend using three hinges (1½ pairs). This extra support prevents the door from “dropping” over time.
- Positioning: Place the top hinge 150mm from the top and the bottom hinge 225mm from the bottom. The third hinge should be equally spaced between hinges.
- Marking out: Mark the outline of the hinge on the door edge with a very sharp pencil.
- Morticing out: Use a Palm Router or Chisel the recess to the depth of the hinge leaf. If you go too deep, you’ll end up “hingebound.”
- Pilot holes: Always drill pilot holes for your screws. This prevents the premium timber from splitting.
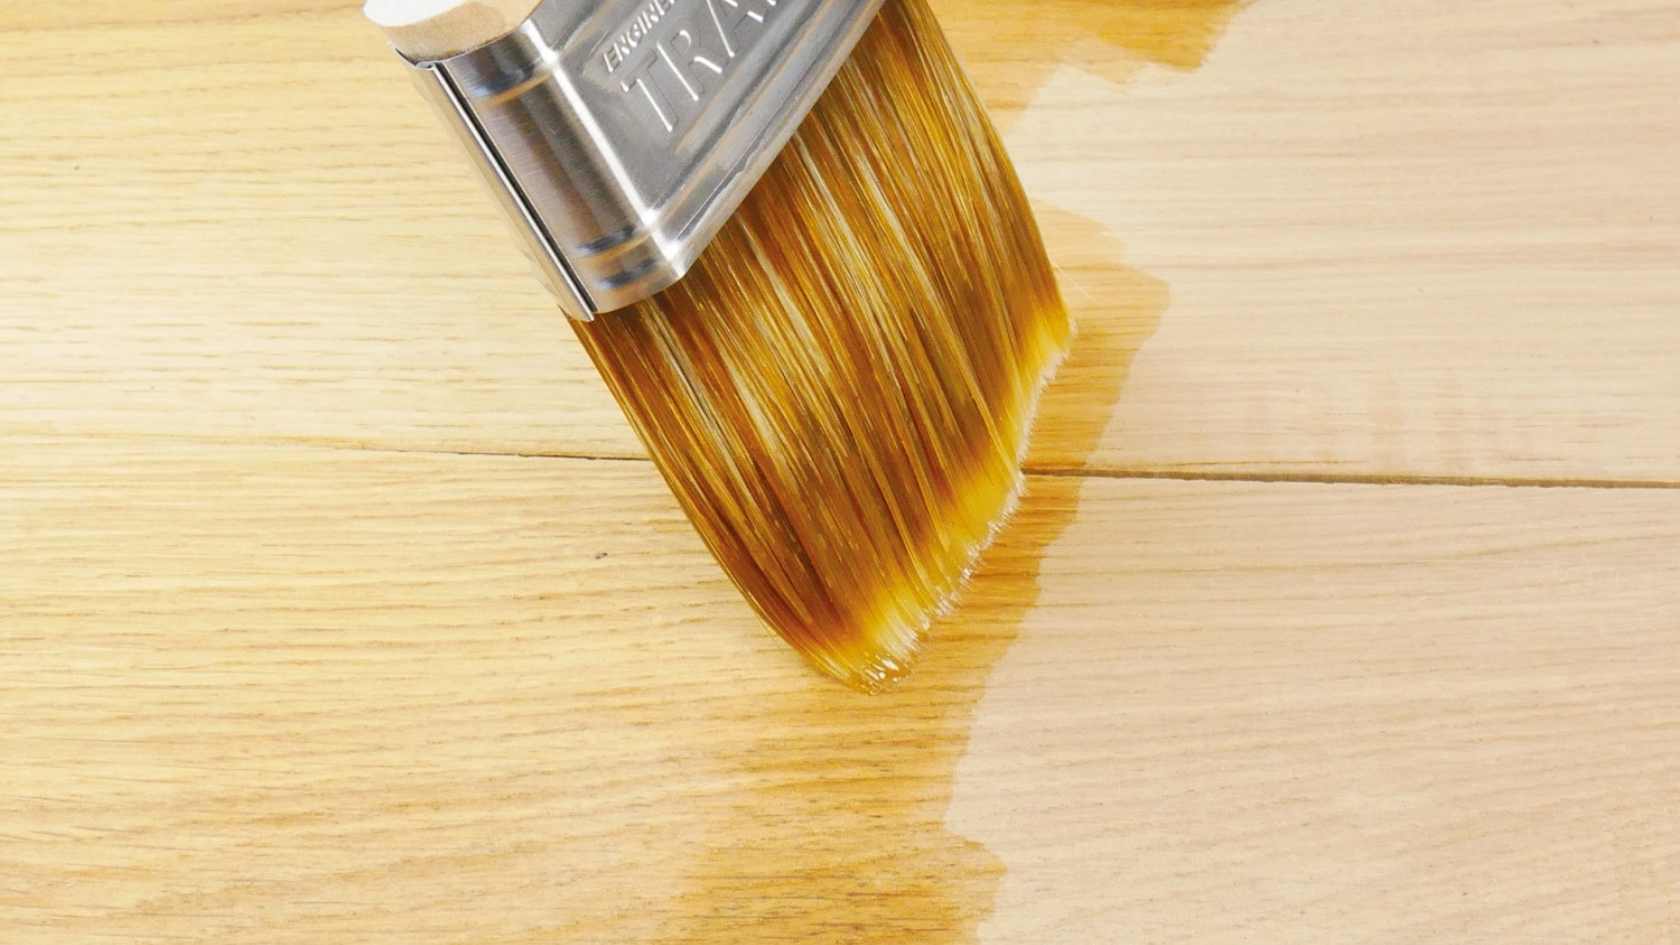
Step 4: The “Six-Side” Seal (Crucial Step)
This is the secret to a long-lasting door. Before you hang the door for the final time, you must seal it.
- The Rule: You must apply your finish (we recommend a Hardwax Oil like Osmo or Treatex) to all six faces – the front, the back, both long sides, and most importantly, the top and bottom edges.
- Why? The top and bottom edges are open grain. If they aren’t sealed, they act like straws, sucking up moisture from the air, which causes the door to swell or warp.
Step 5: Hanging and Finishing Touches
- The First Screw: Place the door in the frame using wedges to hold the 3mm gap at the top. Fix one screw into the top hinge and one into the bottom.
- Check the swing: Close the door gently. If it rubs, you may need to plane a “leading edge bevel” (a very slight angle on the slamming side) to give it clearance.
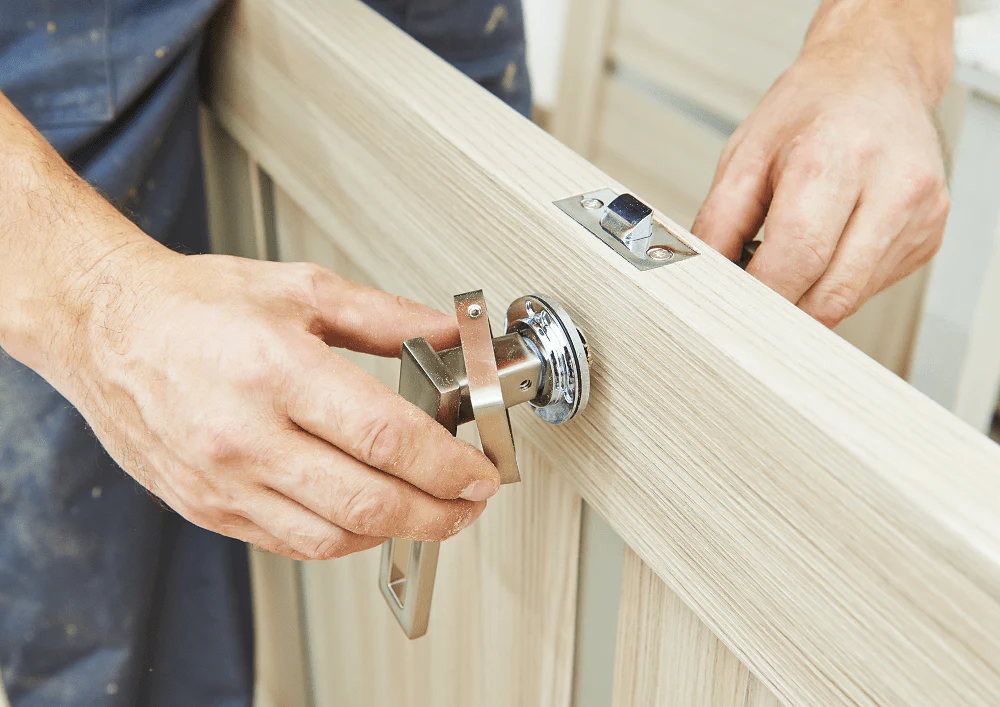
- Hardware: When fitting your latch and handles, ensure the holes you drill are only as large as necessary. A “tight” fit for your ironmongery keeps the door structurally sound.
Top Tips for a Professional Finish
- Thread Lock: Put a tiny drop of thread lock on the grub screws of your handles. It stops them from working loose with daily use.
- Sharp Tools: A blunt chisel is dangerous and leaves a messy finish. Keep your tools sharp for clean, crisp recesses.
- Avoid Water-Based Finishes: For veneered doors, we suggest avoiding water-based stains or “Danish Oils,” as these can sometimes cause the grain to rise or the veneer to bubble.
By following these steps, you’ll have a door that doesn’t just look like a Grain and Bolt product, but performs like one too.